
How to Choose the Right Adapter Ring?

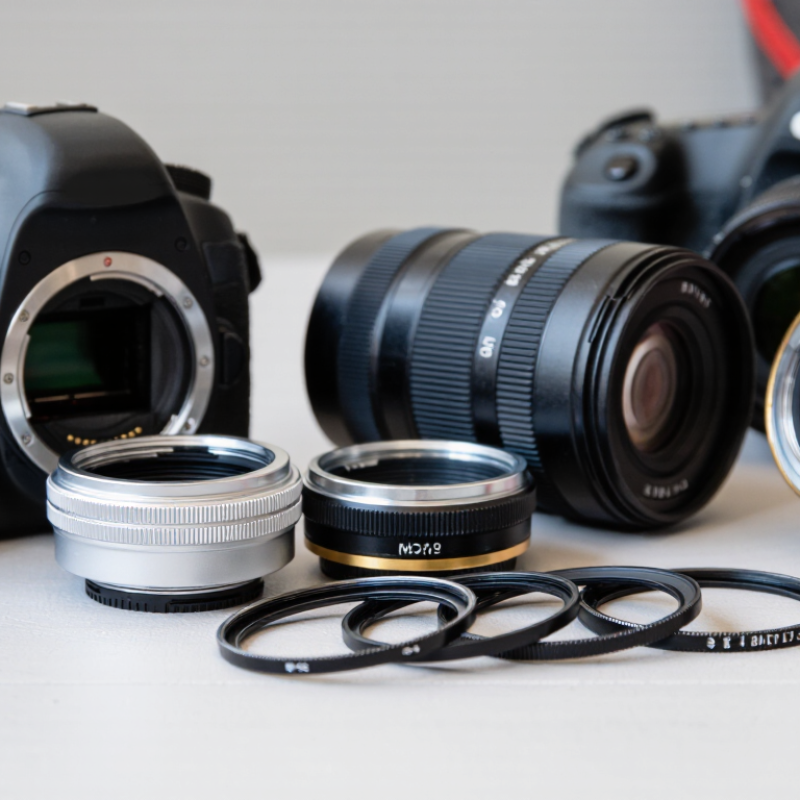
Choosing the right Adapter Ring starts with a simple question: what exactly needs to connect? In photography, that may mean matching a lens filter thread to a different filter size. It could also involve fitting a lens to a camera body. These are not interchangeable tasks. Check the markings on both pieces, such as a lens’s filter diameter, and confirm the ring supports the intended connection. A small mismatch can prevent a secure fit or interfere with nearby controls. Details matter.

Material and design deserve attention, too. Aluminum rings are lightweight, while brass options may resist wear well; actual performance depends on construction and use. Check the product specifications rather than relying on appearance alone. If you use filters, consider whether the ring may cause vignetting, especially with wide-angle lenses or stacked accessories. For lens-to-camera adapters, verify mount compatibility, clearance, and any stated limits on autofocus or electronic communication. A snug fit should not require force. Stop if it binds.

A product title can sound convincing while leaving a key detail unclear. Compare the manufacturer’s compatibility list with your exact equipment model, and contact the seller when specifications conflict. Even careful buyers sometimes overlook a tiny thread marking; I have seen how that turns a quick setup into a return. There is no universal best ring. The right choice is the one that fits securely, preserves the function you need, and suits how you actually shoot.
How to Choose the Right Adapter Ring?

Understanding Adapter Rings and Their Purpose

How to Choose the Right Adapter Ring?

Understanding Adapter Rings and Their Purpose

An adapter ring connects accessories with different thread sizes, most commonly a camera lens and a filter. For example, a 67 mm lens can accept a 72 mm filter through a step-up ring. The ring does not change the filter’s effect; it simply provides a mechanical fit.

Small part. Big difference.

Thread sizes are usually printed on the lens front or inside its cap, marked with a diameter symbol. Match that measurement to the ring, then check the accessory’s thread size. CIPA’s 2023 camera-shipment statistics recorded about 7.7 million digital cameras shipped worldwide. That figure reflects a large, active camera market, where compatibility still matters across varied equipment. It does not, however, measure adapter-ring use.

Step-up rings are often preferred because their wider opening is less likely to block the lens’s view. A step-down ring can work, but its smaller opening may cause dark corners, especially with wide-angle lenses. Check that the threads turn smoothly; resistance can signal misalignment. It is easy to focus on the filter and overlook the ring. I would still test the setup at the widest focal length before relying on it.

Identifying Your Equipment and Mounting Standards

Before choosing an adapter ring, identify the exact connection on both pieces of equipment. Check the camera or instrument body, then inspect the lens, filter, or accessory. Similar-looking mounts can use different thread pitches. An M42 thread, for example, may have a 1 mm or 0.75 mm pitch. They are not interchangeable. Read the equipment markings and manuals where available.

Measure twice. Note the mount type, thread diameter, pitch, and required spacing between the mounting surfaces. For optical equipment, that spacing can affect focus; a ring that fits physically may still place a lens or sensor too far from its intended position. Check the opening, too. A narrow ring can clip the image near the corners, especially with a wide field of view. Do not guess.

A common mistake is relying on a product description that says only “fits 42 mm.” That number may describe diameter, not the complete mounting standard. Compare the full specifications on both sides, and confirm whether the ring preserves any needed electronic contacts or alignment features. If details remain unclear, pause and ask a qualified supplier or technician to verify them. I would rather recheck one measurement than force a ring onto delicate threads.

Measuring Diameter, Thread Size, and Other Key Dimensions

How to Choose the Right Adapter Ring?

An adapter ring should match both the diameter and the thread, not just look close. Use a caliper to measure the mating part across its outer edges. Keep the jaws level; a slight angle can change the reading. Record the result in millimeters or inches, and avoid switching units midway. Small differences matter.

Thread size needs more than a diameter check. Identify whether the thread is internal or external, then check its pitch—the distance between adjacent thread peaks. A thread-pitch gauge helps, but clear photos and the part’s specifications can also confirm the match. Check the thread standard too, since similar-looking threads may not fit safely. Measure usable depth and note nearby shoulders or rims that could block the ring. A ring that starts but binds is not a match. Don’t force it.

Tips: Clean the threads before measuring. Compare measurements twice, and test-fit gently by hand. If the ring catches, stop and recheck the pitch and thread direction; a rushed “close enough” choice can damage the mating surfaces.

How to Choose the Right Adapter Ring? — Measuring Diameter, Thread Size, and Other Key Dimensions

Dimension What to Check How to Measure Example or Reference Why It Matters
Thread diameter Nominal diameter of the threaded opening or fitting, in millimeters or inches. Check the component marking or measure across the thread with calipers. For an internal thread, measure the opening and confirm the nominal size from the product specification. A marked 52 mm filter thread is nominally 52 mm; the measured thread crest may differ slightly. The adapter’s two connection sizes must match the parts being joined.
Thread pitch Distance between adjacent thread peaks, or threads per inch for inch-based threads. Use a thread-pitch gauge, or compare the part with a reliable specification. Do not identify pitch by diameter alone. Many photographic filter threads use a 0.75 mm pitch, but other equipment may use different pitches. A matching diameter with a different pitch can cross-thread or fail to engage correctly.
Thread standard and profile Thread form and standard, such as metric, Unified, or pipe thread; also check whether the thread is tapered or parallel. Look for markings or manufacturer specifications. If unknown, compare with a thread gauge and verify the standard before fitting. A 1/4-20 UNC thread and an M6 × 1 metric thread are different despite having similar diameters. Standards that appear similar may not be compatible and can damage the threads.
Connection gender Whether each adapter end has an external (male) or internal (female) thread. Inspect each end: external threads are on the outside; internal threads are inside the opening. A step-up filter ring commonly has a smaller female thread on one side and a larger male thread on the other. The adapter’s end configuration must mate with both components.
Adapter size pair The nominal size at each end and the direction of the size change. Read the size markings or product specification; confirm which size connects to each component. A 49–52 mm step-up ring connects a 49 mm filter-thread fitting to a 52 mm accessory. “Step-up” and “step-down” describe the change in nominal thread size, not the physical thickness of the ring.
Outside diameter The maximum external width of the adapter body, including any knurled or raised edge. Measure across the widest part with calipers. The outside diameter may be larger than the nominal thread size; its exact value varies by design. Check clearance around nearby parts, lens barrels, housings, or recessed openings.
Overall thickness The adapter’s axial height, including any flange or retaining lip. Measure from the adapter’s outermost face to the opposite face with calipers. Compare the measured thickness with the available clearance in the assembly. Excess thickness can prevent a cover, filter, or connected part from seating properly.
Engagement depth How far the thread enters the mating component before the adapter seats. Check the threaded section length and the depth available in the receiving part; assemble gently by hand to confirm fit. Thread depth can vary even when nominal diameters match. Insufficient engagement may make the connection loose; excessive depth can cause interference.
Seating face and clearance Whether the adapter has a flat seating surface and enough room around the opening. Inspect the mating surfaces and check for shoulders, recesses, seals, or protruding parts. Some fittings require a gasket or a shoulder to seat against a flat face. Correct seating helps prevent gaps, misalignment, and damage during tightening.

Note: Dimensions and thread standards vary by application. Confirm both mating parts’ specifications before ordering, and never force an adapter that does not start smoothly by hand.

Comparing Materials, Fit, and Functional Requirements

Choosing the right adapter ring starts with its material and working environment. Aluminum is light and easy to handle, while stainless steel often suits damp or higher-load settings. Brass can help where corrosion resistance and smooth machining matter. Material alone does not guarantee performance. Check temperature limits, expected loads, and contact with nearby components before choosing.

Fit is just as important. Compare the ring’s inner and outer diameters with the parts it must connect, and check its thickness and tolerance. A ring that looks close may still wobble, bind, or leave a gap. It is tempting to compensate with extra force, but that can damage threads or distort the assembly. A careful dry fit is better. If the parts do not seat evenly, recheck the measurements.

Tips: Confirm whether the connection needs a seal, insulation, alignment, or vibration resistance. Inspect the mating surfaces for burrs, then test the assembly under light load before regular use. Keep the dimensions and operating conditions on record; that makes replacement easier. One detail is easy to overlook: coatings can change the final fit. Check the finished dimensions, not only the nominal size.

Verifying Compatibility Before Purchase and Installation

An adapter ring is compatible only when its thread size and direction match the lens. Check the marking on the lens barrel, often shown as “Ø67 mm.” Do not confuse this with focal length, such as 50 mm. A 67–82 mm step-up ring fits a 67 mm lens thread and accepts an 82 mm filter. A step-down ring works in the opposite direction, but may block light near the frame edges. Small detail, big difference.

CIPA’s 2024 Digital Camera Shipment Report recorded about 6.3 million interchangeable-lens cameras shipped worldwide. That figure does not define filter-thread sizes; it does underline how varied camera systems are. Verify the lens manual or manufacturer’s specification, then compare the ring’s diameter and thread type with the filter. Check whether the lens has a rotating front element, deep hood, or limited clearance. These can affect installation or use.

Before buying, confirm whether the ring is step-up or step-down and whether it can sit flush without force. Start threading by hand. If it catches, stop; forcing it can damage fine threads. Also consider vignetting, especially with wide-angle lenses or stacked filters. Even a careful specification check can miss a clearance issue, so test the ring without a filter first. A little hesitation here is sensible.