
7 Tips for Choosing a Horizontal Shaft Concrete Mixer
Choosing a Horizontal Shaft Concrete Mixer is not simply a matter of comparing motor power, drum size, or purchase price. The machine must match your materials, production rhythm, site conditions, and maintenance capacity. A mixer that performs well with damp aggregate may struggle with stiff, fiber-reinforced, or low-slump concrete. Small details matter. Watch the discharge gate, inspect the mixing arms, and listen for uneven motor noise.
Concrete equipment specialist David White puts it clearly: “The right mixer is chosen by the concrete it must produce, not by its brochure capacity.” That principle deserves attention. Rated volume can look impressive, yet the usable output may be lower when the mix contains large aggregate or requires longer blending. Operators should also examine shaft design, liner protection, cleaning access, gearbox quality, and spare-parts availability. These features influence daily consistency more than attractive specifications.
This guide presents seven practical tips for selecting a Horizontal Shaft Concrete Mixer with fewer surprises after installation. It considers mixing efficiency, batch size, power demands, wear resistance, safety, service support, and total operating cost. Some recommendations may seem obvious. They are still easy to overlook during a rushed purchase. A cheaper machine can become expensive when production stops, liners wear quickly, or technicians cannot reach the interior safely. Measure your actual workflow first. Then challenge every supplier claim against real operating conditions.
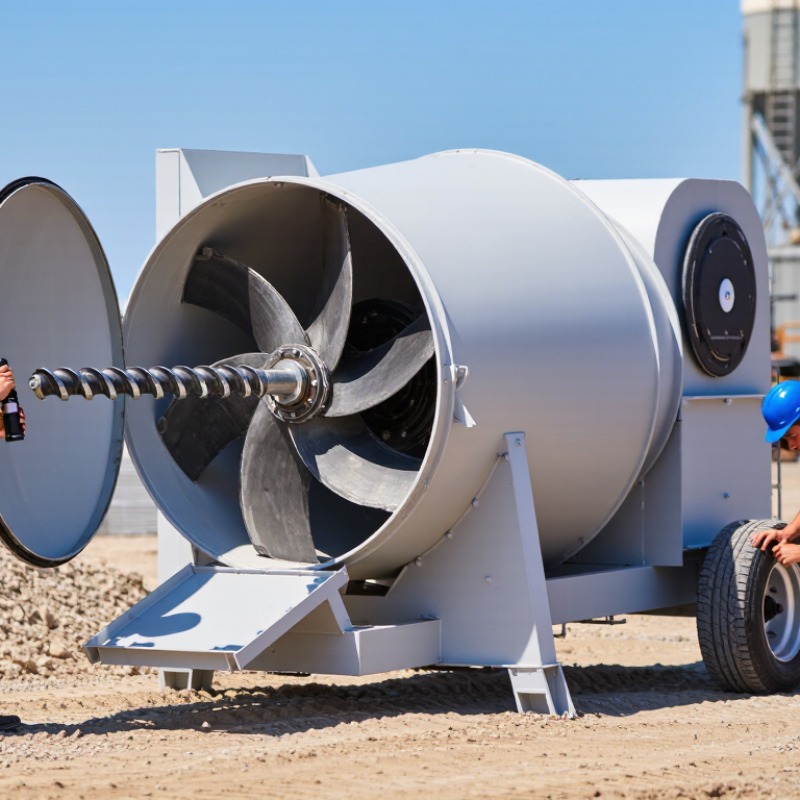
Define Capacity: Match 1–6 m³ Batches to Required Concrete Output
Choosing a horizontal shaft concrete mixer starts with one practical question: how much concrete must the site produce per hour?
Rated capacity is only a starting point. A mixer listed for 1 m³ may deliver less usable volume after allowing space for aggregate movement and safe mixing.
For small repair projects, 1–2 m³ batches can provide better control. Operators can adjust water and admixture levels without creating excess material.
A 3–4 m³ mixer suits regular foundations, slabs, and drainage work. Larger 5–6 m³ batches may support continuous placement, but they require steady aggregate supply, enough loading space, and trucks ready to receive concrete.
Measure the full cycle, not only the mixing time.
Loading, moisture checks, discharge, and cleaning all affect hourly output. For example, a 4 m³ batch taking twelve minutes produces about 20 m³ per hour in theory. Delays may reduce that figure sharply. Rain, sticky aggregates, or manual loading can create a less predictable result.
Do not fill the chamber to its maximum every time. A slightly smaller batch may mix more evenly and discharge faster.
I have seen production plans fail because they counted rated volume instead of usable output. That mistake is easy to repeat.
Compare the required daily volume with real cycle data from similar materials. Leave room for interruptions, because concrete work rarely follows a perfect schedule.
Compare Mixing Systems: Twin-Shaft Mixers Often Complete Cycles in 30–60 Seconds
Choosing a horizontal shaft concrete mixer starts with the mixing cycle, not the brochure capacity.
Twin-shaft systems often complete a cycle in 30–60 seconds, depending on the recipe, moisture, loading order, and discharge method. That speed can support steady production, but it is not automatic. Watch the discharge.
Compare how each machine handles cement, aggregates, water, and additives. Strong counter-rotating shafts usually create intense movement across the full chamber. This can improve uniformity when the mix contains dry pockets or unevenly sized stone.
Ask for test results using your actual materials. A laboratory sample may behave differently from damp aggregate delivered at dawn.
Check the paddles, liners, seals, access doors, and cleaning points.
These details affect downtime more than a short advertised cycle. Inspect whether operators can remove buildup safely and reach wear parts without excessive disassembly. Consider control accuracy too. A reliable water meter and repeatable loading sequence help protect every 30-second cycle.
Do not judge speed alone. A faster cycle with poor discharge still wastes time.
Review batch size, motor load, maintenance access, and expected service life together. One practical mistake is choosing maximum capacity while ignoring the plant’s feed rate. The mixer may wait between batches. That weakens the benefit.
Run several trial batches. Measure moisture, discharge consistency, and actual cycle time. Record the results.
Even experienced teams can overlook small delays caused by weighing, opening gates, or cleaning.
Check Power and Torque: Assess Motor Ratings from 15–110 kW
Tip 1: Match motor power to the batch, not only the mixer’s volume. Horizontal shaft mixers commonly use motors from 15 to 110 kW. A 15 kW motor may suit lighter, smaller batches. Dense concrete, low-slump mixes, and frequent production need more reserve. Check the manufacturer’s rated capacity and the actual material density.
Tip 2: Study torque at startup. Concrete can resist movement when the drum is full and settled overnight. High power does not always mean high starting torque. Ask for gearbox torque data, overload protection, and the maximum safe starting load. In practical checks, listen for belt slip, sudden vibration, or slow shaft acceleration. These signs deserve attention.
Tip 3: Consider your working conditions carefully. A motor running near its limit may consume more energy and overheat during long cycles. Confirm voltage, duty rating, cooling, and service access before choosing a 55, 75, or 110 kW unit. I have seen capacity estimates look acceptable on paper, yet moisture changes made the mix noticeably harder to move. My own early evaluations focused too much on kilowatts. Torque curves and batch consistency often tell the more useful story. Leave a reasonable power margin, but avoid paying for capacity your process cannot use.
Verify Material Compatibility: Support Aggregates up to 80 mm in Size
7 Tips for Choosing a Horizontal Shaft Concrete Mixer
Verify Material Compatibility: Support Aggregates up to 80 mm in Size
Large aggregates can improve some concrete mixes, but they also challenge mixer performance. An 80 mm stone needs enough clearance around the shafts, paddles, and discharge opening. Check the mixer’s technical data, not only the maximum particle size shown in advertisements. A machine may accept 80 mm aggregates but struggle with a dense or poorly graded mixture.
Tip: Inspect the aggregate before testing. Measure its largest pieces, then review their shape and surface texture. Angular stones can create more resistance than rounded stones. Moisture matters too. Wet fines may stick to the mixing chamber, while dry material can increase dust and friction. These details are easy to overlook.
Run a small trial batch before full production. Add the coarse aggregate gradually, then observe noise, vibration, mixing time, and motor load. Stop immediately if stones bridge near the inlet or remain unmixed at the bottom. In field testing, the first batch may look acceptable, yet discharge unevenly. That is a useful warning, not a minor issue. Recheck the paddle clearance and inspect wear areas after testing. Remember, supporting 80 mm aggregates does not guarantee every mix will perform well. The actual result depends on aggregate grading, moisture, cement content, and loading sequence.
Evaluate Wear Protection, Safety Controls, and 2–5-Year Maintenance Costs
7 Tips for Choosing a Horizontal Shaft Concrete Mixer
Evaluate wear protection before comparing purchase prices. Tip one: inspect the mixing paddles, liners, shaft seals, and discharge gate. Thick, replaceable liners can reduce downtime when abrasive aggregates are used. Ask for material specifications and expected service intervals. Tip two: check whether worn parts can be changed safely on site. A practical design matters more than impressive photographs.
Treat safety controls as production equipment. Tip three: confirm guarded access, emergency stops, lockout provisions, and clear inspection points. Controls should remain usable with dusty gloves. Tip four: ask how the mixer prevents unexpected startup during cleaning. Test the control logic with a qualified technician. Small gaps in procedures become serious problems.
Build a two-to-five-year maintenance estimate before approval. Tip five: record lubricant use, seal replacement, liner changes, labor hours, and planned downtime. Tip six: request service records from comparable installations, not only theoretical figures. I once underestimated cleaning labor, and the budget suffered. Tip seven: compare support response times and spare-part availability. A cheaper machine can cost more when one seal delays a full shift. Leave room for uncertainty; aggregate hardness and operator habits rarely match the brochure.
| Tip | Evaluation Area | What to Inspect or Ask | Preferred Selection Benchmark | Estimated 2-Year Maintenance Cost* | Estimated 5-Year Maintenance Cost* | Warning Signs |
|---|---|---|---|---|---|---|
| 1 | Wear Protection | Check the liner material, liner thickness, paddle or blade construction, replaceability, and the availability of high-wear components. | Replaceable wear liners and paddles with reinforced surfaces in the impact and discharge zones. The design should allow worn parts to be replaced without removing the complete mixer. | US$1,200–3,500 | US$4,000–9,000 | Warning: welded-in wear parts, uneven liner gaps, exposed shell surfaces, or no documented wear-limit measurements. |
| 2 | Shaft Seals and Bearings | Review seal accessibility, bearing protection, grease points, inspection ports, and the manufacturer’s recommended lubrication intervals. | Protected bearings and accessible shaft seals with clear lubrication instructions. Seals should be serviceable without extensive dismantling of the drive assembly. | US$700–2,000 | US$2,500–6,000 | Warning: frequent grease leakage, concrete ingress, abnormal bearing noise, shaft movement, or difficult access to service points. |
| 3 | Safety Controls | Verify emergency-stop devices, access-door interlocks, lockout points, guards, oversize-object protection, and safe access for cleaning. | Interlocked access covers, visible emergency stops, fixed guards, and lockout/tagout provisions should be included in the standard operating design. | US$300–1,000 | US$1,000–3,000 | Warning: bypassable interlocks, unguarded rotating parts, emergency stops located only on one side, or no documented functional test. |
| 4 | Drive and Torque Capacity | Compare motor power, gearbox rating, starting torque, overload protection, duty cycle, and the actual mix design used at the site. | A drive system sized for the heaviest routine mix with overload protection and sufficient starting torque for stiff or low-slump concrete. Avoid selecting solely by nominal batch volume. | US$900–2,500 | US$3,500–8,000 | Warning: repeated overload trips, excessive gearbox temperature, belt slippage, vibration, or operation near maximum capacity every cycle. |
| 5 | Cleaning and Inspection Access | Assess cleanout doors, washout points, internal visibility, drainage, scraper access, and the time required for a routine end-of-shift inspection. | Large lockable access openings and effective drainage that permit removal of buildup without entering the mixer. Internal inspection should be possible with the equipment isolated. | US$500–1,500 | US$2,000–5,000 | Warning: trapped concrete, restricted cleanout openings, poor drainage, inaccessible corners, or a cleaning process requiring entry into the vessel. |
| 6 | Parts and Maintenance Support | Request a spare-parts list, wear-part drawings, recommended stock levels, service intervals, and typical delivery times for critical components. | Standardized components and documented service procedures with critical wear parts available locally or within a predictable replenishment period. | US$400–1,200 | US$1,500–4,000 | Warning: proprietary-looking dimensions without drawings, unclear part numbers, undocumented service intervals, or long lead times for seals and liners. |
| 7 | Total Cost of Ownership | Combine purchase price, installation, electricity, planned maintenance, wear parts, downtime exposure, cleaning labor, and expected service life. | Select the lowest five-year operating cost, not simply the lowest purchase price. Compare equivalent batch capacity, duty cycle, material abrasiveness, labor rates, and annual production volume. | US$4,000–12,000 | US$14,500–40,000 | Caution: unusually low purchase quotations that exclude wear parts, commissioning, safety upgrades, routine lubrication, or cleaning labor. |